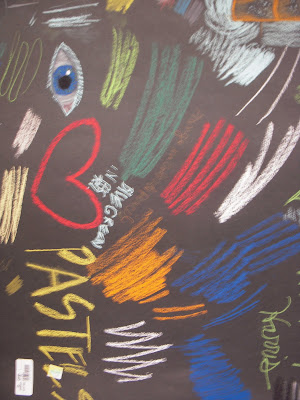
These are the images of the process I went through to create my final drawings for this project. I started by exploring the mediums of colored pencil and pastel. The image of the eye is done in a mixture of both. During critique I was told to use colored pencil because it captured the glow that my project produced in the best manner. It was also suggested for me to punch holes in my expressive rendition to really show how my project works. This is best seen in the last photograph on this page. The most recent images at the top of the page are scans of my drawings. They look much better :)
Friday, November 27, 2009
Suburban Stars: The Drawings
These are the images of the process I went through to create my final drawings for this project. I started by exploring the mediums of colored pencil and pastel. The image of the eye is done in a mixture of both. During critique I was told to use colored pencil because it captured the glow that my project produced in the best manner. It was also suggested for me to punch holes in my expressive rendition to really show how my project works. This is best seen in the last photograph on this page. The most recent images at the top of the page are scans of my drawings. They look much better :)
Suburban Stars:The Final Model
This is the final model for my Suburban Stars project, it is approximately 6 feet in height, and has about an 8 inch diameter. The reason for its gigantic height is to create something that you can physically look up at, taking that feeling of looking up at the night sky to the next level. The darker photos I have posted show the field of light it creates in the dark.
Monday, November 23, 2009
Luminescence: The Product- Suburban Stars Model 1
This is the first model of my luminaire for our luminescence project. it is about 8 1/2 inches tall with about a 4 inch diameter. during critique it was suggested to me that i should create another version of this at a much larger scale. This size would be more effective for my concept because it be be something that you would actually look up at and walk around, making it a full 360 degree experience.
This was the test model for my original idea. i call it suburban stars because that is something I have noticed. When you live in the city you never have a truly starry night. You may be able to see one or two really bright ones but you never see a whole sky filled with stars, unless you go out into the country. This is what my project is supposed to convey. This light emulates the feeling of looking at a sky filled with stars. This project creates a way to have the feeling of looking up at a star filled sky, so that even the suburbs can have stars.
Saturday, November 7, 2009
Luminescence: A Study of Light
For this project we were told to conduct some research as far as studying different types of light, so I took some photos exploring lamp light, spotlight, evening, mid day, and morning light. Most recently I have added a black and white photo exploring night light, in addition to another exploration of lamplight on a wall. I enjoy the twinkling of the street lights and the speckled texture of the concrete wall. Finally, the last picture I added of the stars I found on The Daily Green's website.
Friday, October 30, 2009
Project Number 5 Analysis
During our Wednesday critique we were told to compare and contrast the dialog between two of our classmates projects. the two projects i chose to analyze were Cassie's and Justin's.
Both Cassie's and Justin's projects seemed to convey the idea if surrounding a smaller space within a larger space. Justin's approach was to use rounded edges, and to leave a gap in the wall of each space. By doing this, his project causes the observer to think about how many spaces his project really creates.
Cassie's project takes a more angular approach to this idea of surrounding, with both of her spaces resembling the star of David. In addition, Cassie leaves no gaps in the walls of her spaces; they are all completely closed.
Cassie's and Justin's projects were also similar in that there was some dispute on whether the negative space around their projects created more than two spaces. But in the end we decided it's all about how you look at it, and that every one i going to see something differently.
Project Number 5: Dialog
For this project we were told to create two spaces that relate to, and create a dialog with each other. My first idea was to have my spaces relate through opposites. For this i created a square space that was smooth, and one that was jagged, using the skewers to create a dialog between the two. kind of like a conversation. Because my jagged cube created to many spaces i had to figure out another way to do this. It was also suggested during critique that i had to many ideas going on and that i should simplify. so i ditched jaggedness and focused on big and small, and extrusion. the pictures above document my first idea with its collage, and my second idea with its collage and orthographic drawings.
Subscribe to:
Posts (Atom)